Friday, December 16, 2011

How to Make a Time-Lapse Video With Your Digital Video Camera

!±8± How to Make a Time-Lapse Video With Your Digital Video Camera

Getting the most out of your digital video camera can mean being able to create some really cool stuff. You just have to step outside the manual a bit and find the cool things you can do with your digital video camera and your editing software.

We have all seen them in a movie or a TV show, those very cool shots where they speed up time and capture a long segment of time and condense it into a very short amount of video. An example is many of the TV news stations nowadays have a camera that captures the day's weather and then they process it down to a 20 second clip to show the clouds and weather racing by on screen.

Well this technique is not just a tool in the hands of the movie makers or the big TV stations. You can do this with your digital video camera gear too. I will go into two ways that you can accomplish this effect and get some cool results for your next video project. This one is worth playing around with in order to find the right settings to get the most dramatic effect.

Technique number one is to use the camera itself to do the time lapse recording for you. Almost all digital video cameras have the ability to do an interval recording. What this means in a nutshell is that you tell the camera how long you want to record for and how long in between recordings and it will go on autopilot for you for as long as the battery lasts or the tape runs out. This is what those cameras at the convenience store do, they record a few seconds of motion every 30-60 seconds giving the overall view of the traffic in the store over time.

Now if you want to capture some time lapse in your digital video camera you will need to get into your cameras menu and find Interval Recording (or in my case Int Rec, as I use a Sony PD 150 for my camera) When you select this option you will decide how long of an interval between shots you want and how long to record each time. If you are trying to capture something that takes a long time to occur and in which not much happens quickly you will want to set the interval at around a minute and the record time as short as possible on your camera. An example would be if you wanted to record a day in the life of a flower or the clouds rolling by in the sky. Suppose however that you want to capture an event that has lots of action and occurs over a much shorter time frame. Then you would want to shorten the interval between recordings and increase the time of each recording. So in this case you might record every 15-30 seconds and record up to 2-3 seconds of video each time.

I used this technique to capture an afternoon of work being done by a team of carpenters on my house remodeling project. The result was a flurry of activity as workers raced hither and yon nailing boards, carrying equipment and building walls. I have added it to my photo collection of the project. (Hey I had to live through the project so I might as well have a great record of it for posterity!)

Now suppose you have one of the great software video editing packages on your computer to work with your digital video camera. Now you can do it in post as they say in the business. You can record any length of video you want (subject to the limitations of your tape length) and then import it into your editing program.

Sidebar:

I use Adobe Premiere Pro for my editing jobs, but I have also used Avid DV Express, Final Cut Pro, and others in the non linear editing world. These are all great programs and are very powerful products that can create some very professional looking videos. You don't have to have these products to create your own videos but if you are serious about digital video editing it might be a good idea to take a look at these options.

I digitize my raw video of the scene I am doing time lapse on into my computer (big hard drive, video eats up GB's of space) and then import the clip into my time line. From the timeline you can then select the clip with a right click. From there you will be given a menu with options depending on the software you use. Select the option that says "duration", "speed" or something similar. Change the speed of the clip so that time will speed up considerably. If you have an hour of video in the clip and want to shorten it to 2 -5 minutes then you need to increase the speed of the clip to 3 or 4 thousand percent of normal. This will require your software to render the clip at the higher speed and may take some time top process depending on the speed of your computer.

Once you have rendered the video clip at the new speed you will want to play it to see if the movie flows evenly or if you will want to readjust the speed setting to make it better. Sometimes you may want to shorten your raw video and adjust the speed down somewhat in order to get a smooth flow of action. Once you have rendered the clip at the new speed you can now cut and splice it as you see fit with the speeded up action intact. There are some things you will record that might only need a slight speed change, take for instance some digital video of your kids playing sports. Double or triple the speed of the clip and show it to them and you might have them rolling on the floor.

You can also use these techniques to capture the growth of a flower or plant over the course of days or weeks. Simply set you camera in exactly the same place at the same time each day and record an interval that works each day fro however long you want to document. May be you get the seedling just breaking soil and follow it all the way through turning into a full grown plant.

Another interesting idea is to capture the path of the moon across the night sky. Set up your camera on a tripod in a spot that can see the path of the moon for several hours. Set the camera to interval record and put the moon on one side of the frame so that it will pass across the frame as the night passes. This one may require some testing in order to get the exposure and framing right as well as the right interval to record at. Most likely you would want to set the interval as long as you can and the record time as short as you can but do a test run first to see what works.


How to Make a Time-Lapse Video With Your Digital Video Camera

Cheep Cuisinart Fp14dc Fellowes Shredders Troubleshooting Decide Now Rolex Watch Dials Review

Monday, December 12, 2011

Panasonic AG-3DP1 3D P2 HD Shoulder-Mount Camcorder - NAB 2011

Best Prices Peek A Boo Pals By Kidsline

Sunday, December 4, 2011

A Review of the Covert Key Chain Hidden Camera and Digital Video Recorder

!±8± A Review of the Covert Key Chain Hidden Camera and Digital Video Recorder

The Key Chain DVR is the latest breakthrough in digital video technology. A tiny video camera that records video to micro SD cards for up to fifty minutes is now hidden inside something that looks like your car alarm activator.

No matter if you are in Law Enforcement, a Private Investigator, a concerned parent or spouse, or just like the latest gadgets, this is the latest high tech device that you have to have.

The Covert Key Chain Hidden Camera video camera records high-resolution 640 x 480 videos at 30 fps, with clear audio. With an internal lithium ion battery, the manufacturer claims you can record video for up to 3 hours. In our tests, we were able to record for about 50 minutes.

The keychain DVR is also a 1.2 megapixel digital camera that will also take up to 4,000 high-resolution photographs at 1280 x 1024.

After you charge the Covert Key Chain Hidden Camera for three hours, you are ready to start recording. The device has a built in vibration mode that will tell you when you when the unit is turned on, and when it starts taking video, and still photographs. It won't tell you when you stop filming video, so you have to trust that it works.

The device is laid out like a regular automobile key for late model cars, a black device about 3 inches x 1.5 inches x ½ inch, with several buttons to lock and unlock an automobile, only with the DVR Key Chain Video Recorder, you are turning on or recording video when you push the buttons.

The end of the unit pulls off easily to reveal the USB port, micro SD card slot, and the record/charge status lights.

To start recording video, turn the device on by pushing the ON/RECORD button, which is the top left button with the picture of the "locked" lock for 2 seconds. The unit will vibrate.

Push the ON/RECORD button again, and it will vibrate and start recording video. If the end cap is removed, the blue light will turn red, now you are in video recording mode.

To stop recording, push the ON/RECORD again, and the device will stop recording, though it will not give you a vibration.

To shoot still photographs, push the bottom at the bottom that looks like a lightning bolt. It will take a still photograph and vibrate. Hold it still while this is going on for clear photographs.

You can either shoot more photographs, or shoot more video. To shoot more videos, push the top left ON/ODD button to start recording more video.

When you are finished, push the top right button, which is the "Unlock" button. The unit will vibrate, and turn off.

We believe this is the most mobile and discrete way to record video on the market today due to what the device looks like. Except for the DVR Spy Watch, all of our other hidden camera digital video recorders are somewhat noticeable when you record your subject.

If you point a DVR Spy Pen at someone, they will wonder why you are holding a pen toward them. In our tests, when we used the key DVR Spy Key Chain to record covert digital video, we found not one person thought we were filming them. I was just standing there holding my keys, looking stupid.

We tried to connect the Covert Key Chain Hidden Camera to an Apple computer with the included USB cable, and we saw nothing on the device, no videos or photographs. We then removed the micro SD card and tried to read the card with a SD card reader, and again, nothing showed up.

We then tried to connect the DVR Keychain to a PC with the USB cable, and it did not recognize it either. Only when we turned the unit on first, then we were able to see the video and photo files.

The photographs were large 1280 x 1024, clear, and the color is rich. They are slightly blurry because if you were holding the device, your body is moving. If you can set it down, it will take very clear photographs.

The video was clear 640 x 480, resolution at 27-29 FPS, and we found that the audio was clear with no feedback, weird noises, underwater sounding, or anomalies. You get clear video with clear sound, which is hard to come by in these inexpensive devices.

Lets review the Pro's and Con's of the key chain DVR recorder:

Pro's:

Easy to use, and easy to switch between recording videos and photographs Vibration lets you know when the unit is recording or turned on Large clear video at 30 frames per second Clear audio Huge JPG pictures One of the most discrete video surveillance cameras on the market Clear and large videos with excellent sound quality Huge JPG photo's
Con's:

Does not work at all on an Apple SD Card is not readable on an Apple Device itself does not show up on a PC unless you turn it on.

Like Ben Franklin, who use to weight the pro's and the con's, we have a sure winner as one of the most easily concealed digital video recorders that can help you record video surveillance footage for future needs.


A Review of the Covert Key Chain Hidden Camera and Digital Video Recorder

Retro Lamp Shades Clearance Sale Biometric Device Order Now

Monday, November 21, 2011

Panasonic Professional AG-HMR10 Handheld Solid State AVCCAM Recorder

!±8±Panasonic Professional AG-HMR10 Handheld Solid State AVCCAM Recorder

Brand : Panasonic
Rate :
Price :
Post Date : Nov 22, 2011 07:01:11
Usually ships in 1-2 business days


The AG-HMR10 handheld AVCCAM HD solid-state recorder puts the flexibility of recording and viewing high quality 1080 and 720 AVCHD content directly in the palm of your hand. AVCHD recording is superior to HDV, providing double the recording time and higher quality than older MPEG-2 compression used in HDV formats. The battery-powered HMR10 can be teamed with the optional ultra-compact AK-HCK10 Full HD camera head (POVCAM) to form a versatile, point-of-view camera/recorder system. And because its equipped with an HD-SDI in/out, the HMR10 can also serveas standalone recorder for any HD-SDI-capable camera, switcher and deck. The HMR10 records stunning full HD 1920x1080 resolution images onto low-cost SD memory cards in three recording modes - the highest quality PH mode* (average 21Mbps/max. 24 Mbps), HA mode (approx.17 Mbps) and HG mode (approx.13 Mbps). The fourth recording mode, HE (approx. 6 Mbps), records at 1440x1080. On a single 32GB SD card, the HMR10 can record for up to 3 hours in PH mode and up to 12 hours in HE mode. The handheld unit records in HD formats including 1080/60i, 1080/50i, 720/60p and 720/50p. With input from the AG-HCK10 camera head, the HMR10 will also record 1080/30p, 1080/25p and 1080/24p. The handheld unit gives users instant access to content in thumbnail clips and offers a variety of playback functions and solid-state recording modes. It features a built-in 3.5" LCD screen, flexible operation co

Lowest Price Schwinn 113 Exercise Bike Huggy Bears Clearance Sale

Thursday, November 17, 2011

Panasonic HDC-TM41H HD Camcorder with 16GB Internal Flash Memory

!±8±Panasonic HDC-TM41H HD Camcorder with 16GB Internal Flash Memory

Brand : Panasonic
Rate :
Price : $204.99
Post Date : Nov 17, 2011 19:51:43
Usually ships in 1-2 business days


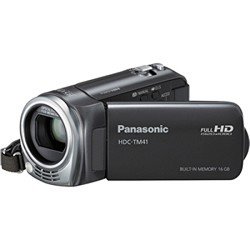
Panasonic HDC-TM41 Digital Camcorder - 2.7" LCD - CMOS - Gray HDC-TM41H Camcorders

Low Cost Stationary Bike Pedals Kitchen Essentials Calphalon Order


Twitter Facebook Flickr RSS


Fran�ais Deutsch Italiano Portugu�s
Espa�ol ??? ??? ?????


Sponsor Links